 |
I say! What are you doing in that thing! |
Flatter Walls, No Dead Airspace
 |
| Heron styling it up in the gas mask |
 | ||
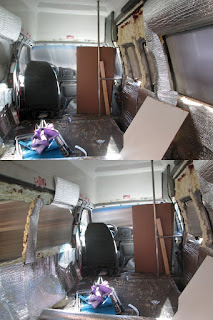
Metal walls with cured spray foam & Reflectix | . |
We would have then filled the joints (somehow) and created a semi-even surface over the white PVC board wall, and either painted that or even put carpet over it.
While that plan might have worked, I liked what my friend suggested after I had mentioned putting carpet on the walls to him. He said how a can of spray glue could get a tight bond to the new sprayfoam surface- no need for bracing or worrying about smashing through a part of the wall with no "stud" behind it while living in it later.
I mourned the lost of the dead air space, because it is good insulation itself, and it is what makes the Reflectix work its insulating magic (we went through some of this in a post from December, ("Is Great Stuff good? DIY Polyurethane Sprayfoam Pros/Cons") but I was convinced we would end up with enough insulation even following this route... and a sturdier wall with a slimmer profile.
After all, all that the van came with was the normal grey plastic paneling with nothing but air in between it and the metal body, and it did a pretty good job insulating.
I admit, some of the plastic panels did had a meager one inch of pink insulation glued on them, but its doubtful they did very much, especially versus what we are doing. More on those plastic panels we saved in a moment.
Maybe A Little Dead Airspace: Floor Underlayment!
And its not that there would be no dead airspace. A little bit of very thin underlayment between the Reflectix and the carpet will provide another small pocket of air, increasing insulation. The underlayment only cost $20 for enough for the walls. I believe it is normally used for carpeted floors. Because it is a plastic or foam type material, it should act as a moisture barrier if tightly installed too.Getting To It
 |
| Reflectix looks snug in most spots. But will it hold??! |
But after heating the van up more and going at it a few more times, we had a pretty snug fit all around.
 |
| Glue as snug as possible, lest it come off later! And cut holes for your locks and stuff! |
Once again, that delicious sandwich is:
- Body of the van (metal)
- 2" or so of spray foam laid as evenly as possible, all allowed to cure of course
- Reflectix, spray glued on
- Thin carpet floor underlayment, spray glued on (to be done)
- Carpet! probably spray glued on (to be done)
 |
| We left a hole open for the heater to blow out. We will have to vent this later. |
 |
| Holes left for the door handles, locks, & speakers too. Missed a speaker slot here though. Oops! |
Now, about that secret trick we get to use
What secret trick? Did I say that? Well, we kept the plastic panels around to see if we could use them before we tossed them out. It seemed unlikely with any design that involved sprayfoam that we'd be able to get them back on, though, especially all of them. Some of them interlocked trickily too, and an extra puzzle was not what we were looking for with this project.Turns out the plastic panels should solve an extremely important issue that we hadn't even gotten into yet, which is making the walls reach the windows well. How we were going to frame the windows was always a daunting question, and ideas like a new wooden window sill were tossed around, but would take some work to implement.
Fortunately, we tried fit the plastic panels back to where they went, and they still mostly fit despite the sprayfoam. We also left uncovered most of the metal brackets the inserts clip into, so they will go in as snug as a bug in a rug, and tuck the carpet walls in around the windows nicely. Who knew that the easiest design approach was to use what you already have???
 |
The newly finished Cave of Perpetual Darkness |
See you on the road!
No comments:
Post a Comment